

Dyeing your hair at home can often feel daunting, fraught with the potential for mismatched colors and uneven application. However, the task has become significantly more approachable with the advent of virtual hair color simulators. These advanced tools allow us to experiment with different hues on our digital avatars, narrowing the options to the perfect shade before we even touch a dye bottle. It's a seamless blend of technology and creativity that promises a professional-looking outcome without the salon price tag.
Hair dying DIY
It's essential to pair the right color with our unique hair type and texture. Not all hair colors work well with every hair type, and understanding these nuances is key to achieving a desired look. Once we've selected our ideal color through a simulator, we must turn our attention to the dyeing process. Tips on preparation, including the necessary supplies and protective measures, can ensure that our experience is smooth and our hair is kept healthy.
When we've successfully prepared, we proceed with the dye application, which demands precision and patience. Techniques vary depending on the hair dye type, and it's crucial to follow instructions meticulously to avoid common pitfalls like patchiness or color bleeding. Post-dye care is just as important to preserve the vibrancy of our new color and maintain hair health, necessitating a comprehensive routine to mitigate any potential damage from the dye.
Key Takeaways
- Virtual simulators offer a no-risk approach to selecting a hair color that complements our personal style.
- Understanding our hair's type and texture is fundamental to choosing the right dye and application technique.
- Proper aftercare is essential to maintain hair health and color vibrancy after dyeing.
Understanding Hair Types and Textures
Before choosing a hair dye, it's crucial to understand your hair's unique characteristics.
Analyzing Hair Porosity
Hair porosity determines how well your hair can absorb and retain moisture.
- Low Porosity: Cuticles are tightly bound; moisture is not easily absorbed. Use lightweight oils.
- Medium Porosity: Cuticles are less tight; hair is balanced and holds styles well.
- High Porosity: Cuticles are loose; hair absorbs moisture quickly but may become frizzy.
Identifying Hair Density
Hair density refers to the number of strands of hair per square inch on your scalp.
- Fine Density: Scalp may be visible; choose dyes that don't weigh hair down.
- Medium Density: Offers a balanced look; most dyes work without special consideration.
- Thick Density: Scalp is hardly visible; require more dye and longer processing time.
Choosing the Right Hair Color
Selecting the perfect hair color involves pairing virtual technology with our unique features. We'll guide you through using virtual simulators, matching your skin tone, and factoring in your natural hair color for a harmonious result.
Using Virtual Color Simulators
Virtual color simulators such as Facetune.com are invaluable tools that allow us to test different hair colors in a risk-free environment. Here’s how to use them effectively:
- Visit reputable salon websites or download hair color apps that offer a virtual try-on feature.
- Ensure you have a well-lit photo of yourself ready to upload or use a live try-on camera option.
- Experiment with various shades and brands to find several potential matches.
- Save your favorite options to compare and consider further.
Complementing Skin Tone
Skin tone greatly impacts how a hair color looks on us. Our goal is to choose a color that enhances our natural complexion.
Identify your skin's undertone: cool, warm, or neutral.
- Cool: Silver jewelry suits you best; veins appear blue or purple.
- Warm: Gold jewelry looks best; veins are greenish.
- Neutral: Both silver and gold jewelry suit you, and veins are blue-green.
Select colors that complement your undertone:
- Cool undertones: Ash blonde, cool brown, deep jewel tones.
- Warm undertones: Golden blonde, copper red, caramel brown.
- Neutral undertones: Most colors work, but opt for neither overly ashy nor golden shades.
Considering Natural Hair Color
Our natural hair color lays the foundation for dye choices, as not all dyes may be compatible or may give the desired result.
Analyze the lightness or darkness of your natural hair.
Established levels range from 1 (black) to 10 (lightest blonde).
Choose a dye that is:
- No more than two levels lighter or darker for at-home dyeing.
- Compatible with the underlying pigment of your natural hair color.
Preparation for Dyeing Your Hair
Before we begin the dyeing process, it's crucial to have everything in place. A well-prepared setup ensures a smooth dye application and protects against potential mishaps.
Assembling Your Tools and Equipment
To start, we’ll need the right tools and equipment. Here’s what should be on our checklist:
- Hair dye kit
- Gloves (usually provided in the kit)
- Old towels or cape to protect clothing
- Hair clips for sectioning
- Comb
- Timer
- Mirror
- Plastic or glass mixing bowl (if the dye requires mixing)
- Application brush (if not included in the kit)
- Petroleum jelly or lip balm to protect the hairline and ears from staining
Having all these items within reach can streamline our dyeing process.
Protecting Your Surroundings
Dye can be messy, so it’s important to cover our work area to avoid stains. Steps include:
- Lay down newspapers or plastic sheets over the surfaces around us.
- Keep extra paper towels or wet wipes handy for immediate spill clean-ups.
- Wearing old clothes or a smock will protect our attire from possible splatters.
Sectioning Your Hair
Proper sectioning helps achieve an even dye application. Follow these steps:
Brush our hair thoroughly to remove any knots.
Part our hair into four equal sections, using hair clips to keep them separate:
- Divide the hair down the middle from the forehead to the nape of the neck.
- Then, part from ear to ear across the crown.
- We’ll work with one section at a time, starting from the back and moving toward the front, which ensures thorough coverage.
Organizing our hair into manageable sections can make the entire dyeing process more efficient and result in a more even color.
Applying the Hair Dye
Once you have selected the perfect hair dye shade with the help of a virtual simulator, we move on to the meticulous application process to ensure optimal results.
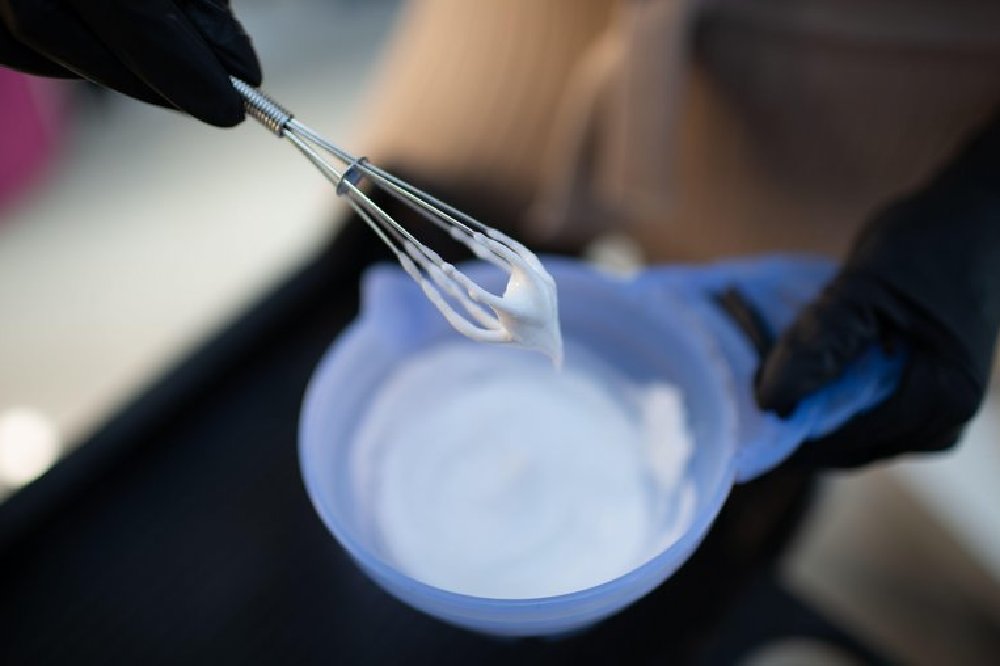
Mixing the Dye
To begin, we need to prepare the dye mixture. Always wear gloves to protect your hands. Follow the instructions on the dye kit, which typically involve combining the colorant and developer in a non-metallic bowl. Mix until the solution is consistent in color and texture.
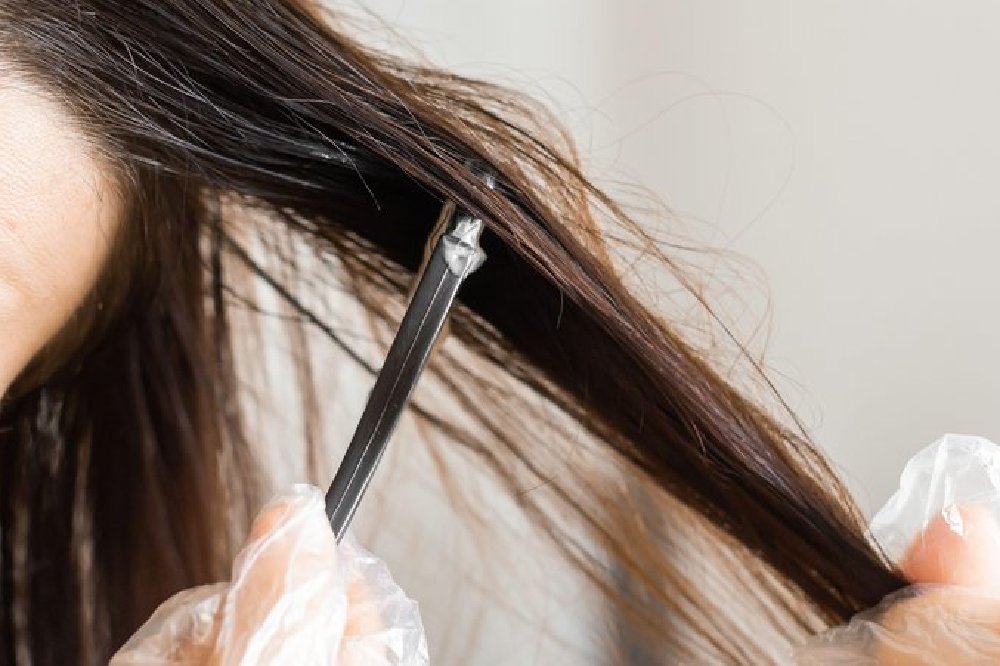
Techniques for Even Application
We recommend starting at the roots, as they require the most color processing time. Use a dye brush for precision, applying the dye in sections. Ensure each section is thoroughly saturated with product for an even finish. Smooth the dye down from the roots to the tips of your hair, working systematically around your head.
- Section Hair: Divide your hair into four sections—down the middle and across from ear to ear. Clip each section.
- Apply Precisely: Start with one section at a time, further dividing it into smaller subsections.
- Ensure Coverage: After applying dye to a subsection, gently massage the dye into the hair to ensure every strand is covered.
Timing and Development
Time management is essential. Start timing as soon as the first section of hair is covered. Use the time recommended on the hair dye kit for development. After time is up, rinse the hair until the water runs clear. Following the manufacturer's instructions will often yield the best color and condition of your hair post-dye.
Aftercare and Maintenance
After dyeing your hair at home, it's crucial to follow proper aftercare and maintenance to ensure the longevity of your hair color. We're here to guide you through preserving the vibrancy and health of your hair.
Washing and Conditioning
When washing your dyed hair, always use sulfate-free shampoo and conditioner made for color-treated hair. This will help prevent stripping away your hair's color and moisture.
- First 72 Hours: Wait at least 72 hours before your first wash to allow the color to fully set in.
- Water Temperature: Use lukewarm water instead of hot, as high temperatures can cause the color to fade more quickly.
- Frequency: Limit washing to 2-3 times a week to reduce color loss.
Reducing Color Fading
Minimizing color fade is essential to maintain the vibrancy of your hair color. Here's what you can do to achieve that:
- Heat Styling: If you must use heat styling tools, always apply a heat protectant and use the lowest temperature setting.
- Sun Exposure: Protect your hair from the sun with hats or hair products with UV protection.
- Chlorine Protection: Before swimming, wet your hair with clean water and apply a leave-in conditioner to create a barrier against pool chemicals.
Regular Touch-Ups
Stay on top of your hair color by scheduling regular touch-ups. Here's how to keep your color looking fresh:
- Roots Maintenance: Retouch your roots every 4-6 weeks, or as recommended by your dye kit.
- Ends Refresh: If the ends of your hair start to fade, apply a semi-permanent color to the affected area.
By following these aftercare and maintenance tips, we can extend the life of our hair color and keep our hair looking its best.
Troubleshooting Common Issues
We understand that even with careful preparation, you can encounter unexpected results when dyeing your hair at home. Below are targeted solutions to common issues to help ensure your hair color looks even and vibrant.
Correcting Uneven Color
If you find that your hair color appears patchy or uneven after dyeing, there are a few steps we can take to correct it:
- Identify the Cause: Is the color uneven due to application error, hair porosity, or a fading previous color?
- Clarifying Shampoo: Wash the darker areas with a clarifying shampoo which may lighten them slightly.
- Color Remover: Use a color remover on the darker sections before reapplying the dye evenly.
- Reapply Color: Mix a new batch of dye and apply it, focusing on the lighter areas to even out the overall hue.
Remember, when reapplying color, always follow the manufacturer’s instructions to prevent further damage to your hair.
Dealing With Color Bleeding
Color bleeding can be an issue, especially with vibrant or dark colors. To mitigate this, try the following:
- Rinse with Cold Water: After dyeing, rinse your hair until the water runs clear and use cold water to seal in the color.
- Avoid Harsh Shampoos: Use color-safe shampoos, as harsh chemicals can cause the color to bleed.
- Section Hair: When applying dye, separate your hair into small sections to avoid the color seeping into unintended areas.
High-quality dye and a meticulous application process can minimize the chances of color bleeding.
Fixing Over-Processed Hair
Over-processing can lead to brittle, damaged hair. If your hair appears over-processed, our tips are:
- Deep Conditioning: Use a deep conditioner or a hair mask regularly to restore moisture and repair damage.
- Protein Treatments: Incorporate protein treatments to strengthen your hair’s keratin structure.
- Trim Damaged Ends: Regular trims can prevent splitting and breakage from worsening.
It’s essential not to over-process your hair in future dye applications; always wait the recommended time between treatments.
Advanced Techniques and Creative Styles
As we explore advanced hair coloring techniques, remember that precision and patience are key. These methods can create depth, dimension, and a personalized look for your hair.
Highlights and Lowlights
Highlights can add brightness and dimension to your hair, giving the illusion of volume. They are created by lightening sections of hair, usually no thicker than a spaghetti strand. Our strategy involves painting thin strands from root to tip, leaving equal sections untouched for a natural look. Lowlights work inversely, adding darker tones to the hair and creating a fuller appearance. They are best applied with a foiling technique, placing fine weaves of color alternately with highlights.
Highlights Technique:
- Choose a shade 2-3 levels lighter than your base.
- Use a fine-tooth comb for even sectioning.
Lowlights Technique:
- Select a color 2-3 shades darker than the base.
- Apply sparingly to avoid a muddy look.
Balayage and Ombre
Balayage is a freehand technique where color is swept onto select strands, giving a sun-kissed radiance. This method offers a softer, more natural growth pattern, reducing the appearance of regrowth lines. We ensure to blend seamlessly from dark to light for a flawless finish.
Ombre, from darker roots to lighter ends, presents a bolder transition. To achieve this, we section the hair horizontally and progressively lighten the tips ensuring the mid-lengths transition smoothly.
Balayage Key Points:
- Work with vertical sections.
- Blend colors for a natural gradation.
Ombre Key Points:
- Isolate the lower section of hair for stronger lightening.
- Gradually decrease the intensity as you move up the hair.
Vivid and Pastel Colors
Vivid hues are striking and require a high level of care to apply. We typically lighten hair to a pale blonde before applying vibrant shades to ensure true color payoff. Pastels, less saturated but equally impactful, follow a similar application process but with softer, lighter tones.
Vivid Colors Application:
- Pre-lighten hair to the appropriate level.
- Apply the vivid dye evenly and saturate each section thoroughly.
Pastel Colors Application:
- Tone pre-lightened hair to neutralize yellows.
- Mix pastel dye with conditioner for a more subtle effect.
Frequently Asked Questions
In this section, we provide straightforward answers to common queries about home hair dyeing using virtual simulators and effective application techniques.
What are the steps to dyeing your hair at home to achieve professional results?
To achieve professional results at home, start by choosing the right dye with a virtual simulator. Then, perform a patch test, follow the exact timing on the dye instructions, and apply evenly. It’s crucial to section hair properly for uniform coverage.
What are the best strategies to avoid missing spots when dyeing hair by yourself?
When dyeing your hair solo, use two mirrors to see all angles of your head. Divide your hair into small sections and apply dye meticulously to each section. Consistent and generous application helps prevent patchiness.
How can you naturally color your hair at home using ingredients found in your kitchen?
Ingredients such as coffee, tea, beetroot, and henna can impart natural hues to hair. For example, coffee can darken hair while beetroot can add a reddish tint. Use these ingredients in a mask form, leave on for an extended period, then rinse out.
What are some recommended virtual hair color try-on apps to use before dyeing your hair at home?
Popular virtual hair color try-on apps include the L'Oréal Paris Hair Color Genius, Garnier Color Match, and Clairol's Try It On Studio. These apps help envision how different colors will look on you before making a commitment.
What are some essential tips for someone dyeing their hair at home for the first time?
For first-timers, it's essential to read the instructions thoroughly, have all tools on hand, and start with a strand test. Wear old clothes, use gloves, and apply petroleum jelly to the hairline to prevent skin staining.
How can you dye your hair at home without using bleach and still get the desired color?
Achieving a desired color without bleach depends on the current hair color and the targeted shade. For lighter colors, select high-lift dyes or gradually color-treat hair over multiple sessions. Darker shades typically don't require bleach.
Tagged in Hair Tips